
Have you ever looked at a tiger and thought, “Wow, I wish I could draw that!”
Good news — you absolutely can.
Learning how to draw a tiger isn’t about being born with talent. It’s about breaking things into small, easy steps. Think of it like building a house with bricks instead of trying to lift the whole thing at once.
Whether you’re a beginner, a student, or just someone who loves sketching for fun, this guide will walk you through everything — slowly, clearly, and confidently.
Grab a pencil. Let’s bring a tiger to life on paper.
Understanding the Tiger’s Shape
Before your pencil even touches paper, take a moment to look at a tiger.
Notice how:
-
The head is round
-
The body is long and powerful
-
The legs are thick and strong
-
The tail flows like a rope
A tiger is basically a mix of circles, ovals, and lines.
Once you understand that, drawing becomes much easier.
Tools You’ll Need
You don’t need fancy supplies.
Basic tools are enough:
-
Pencil (HB or 2B works great)
-
Eraser
-
Paper
-
Optional: black pen for outlining
That’s it!
Simple tools, amazing results.
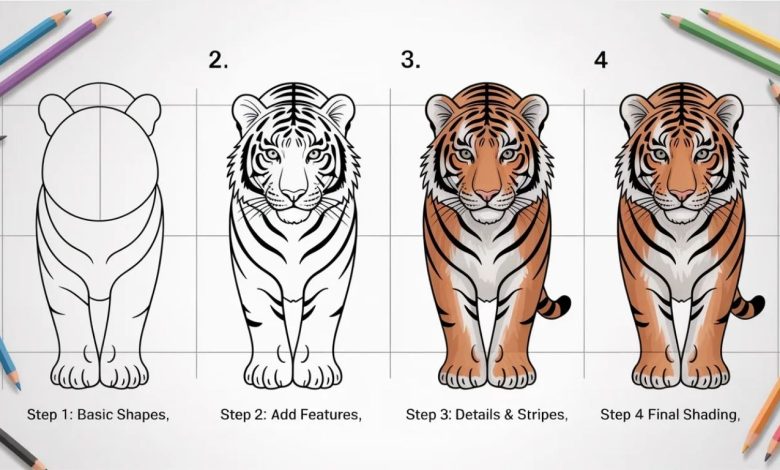
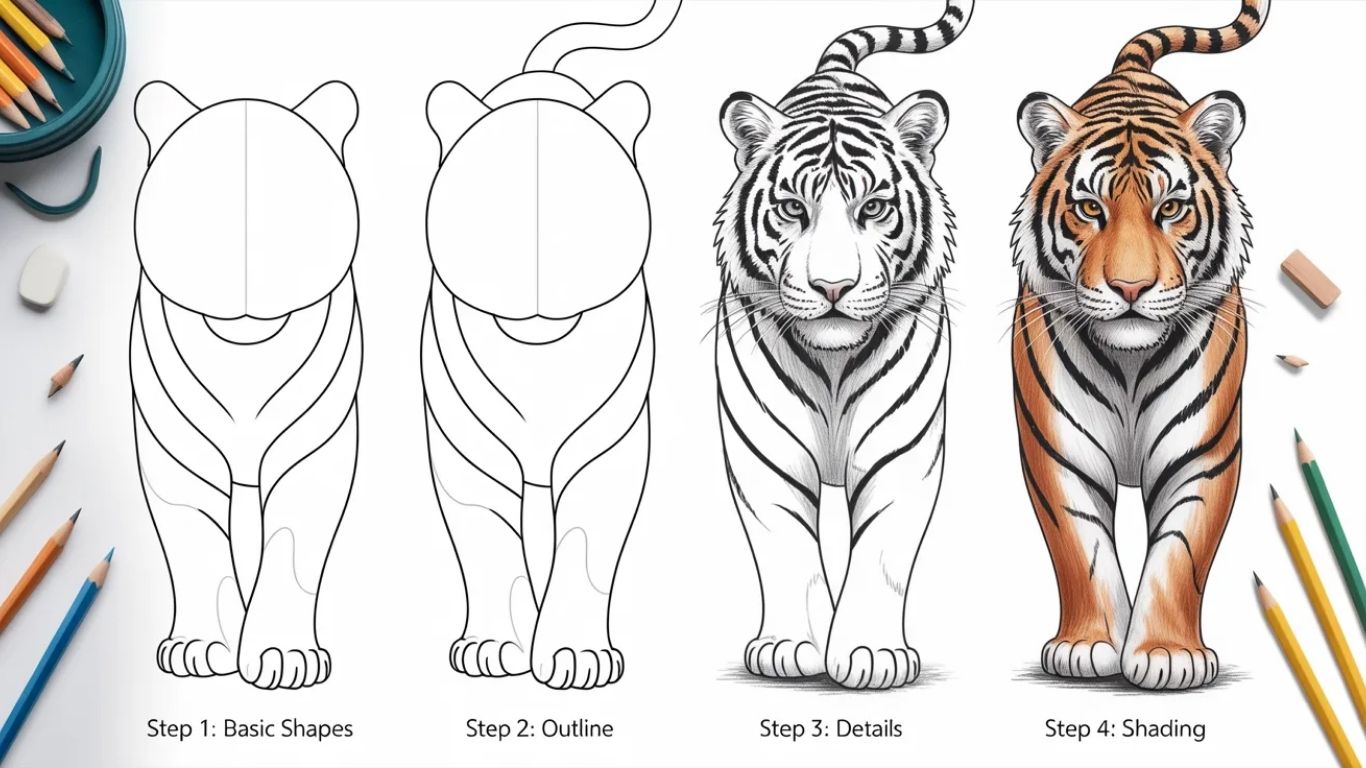
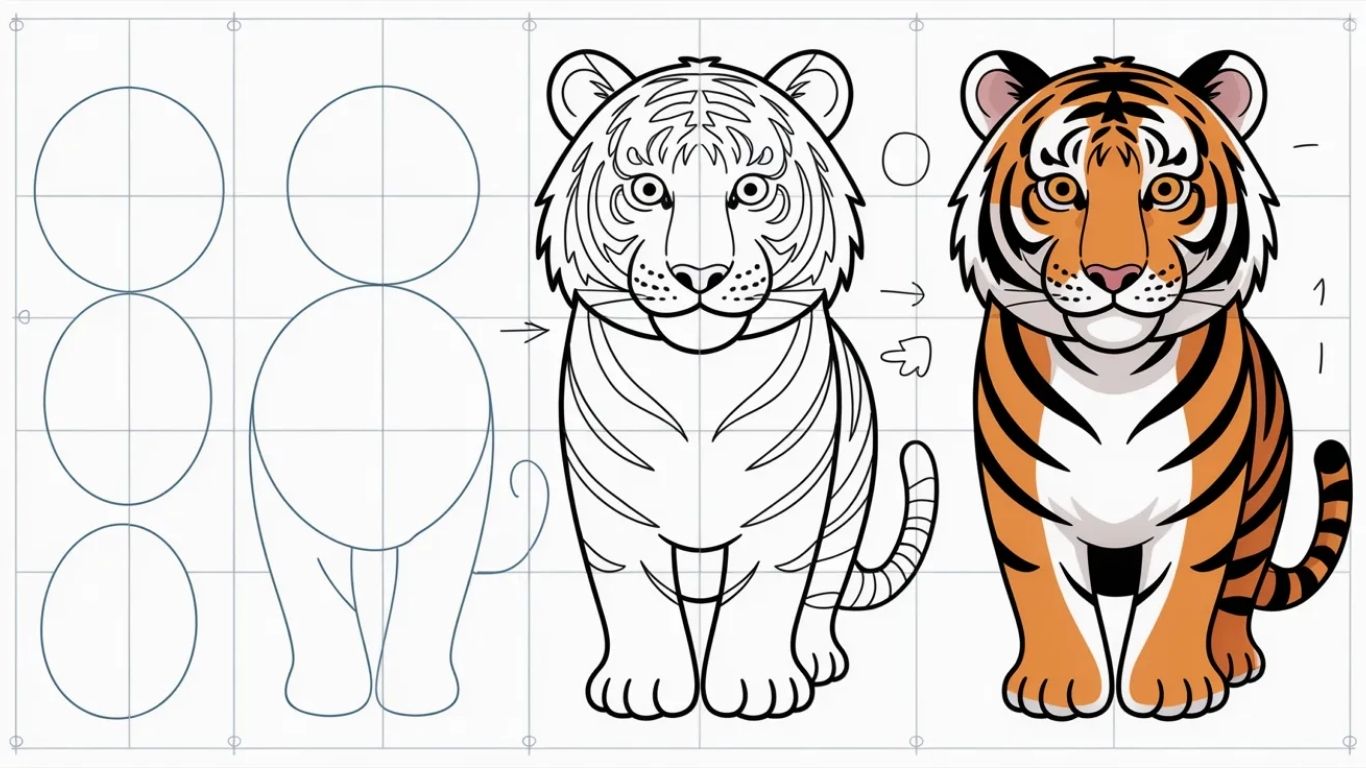
Starting With Basic Shapes
This is the secret that professional artists use.
Start by sketching:
-
A circle for the head
-
A large oval for the body
-
Small circles for joints
-
Lines for legs and tail
These shapes act like a skeleton for your tiger.
Think of it like connecting dots before coloring a picture.
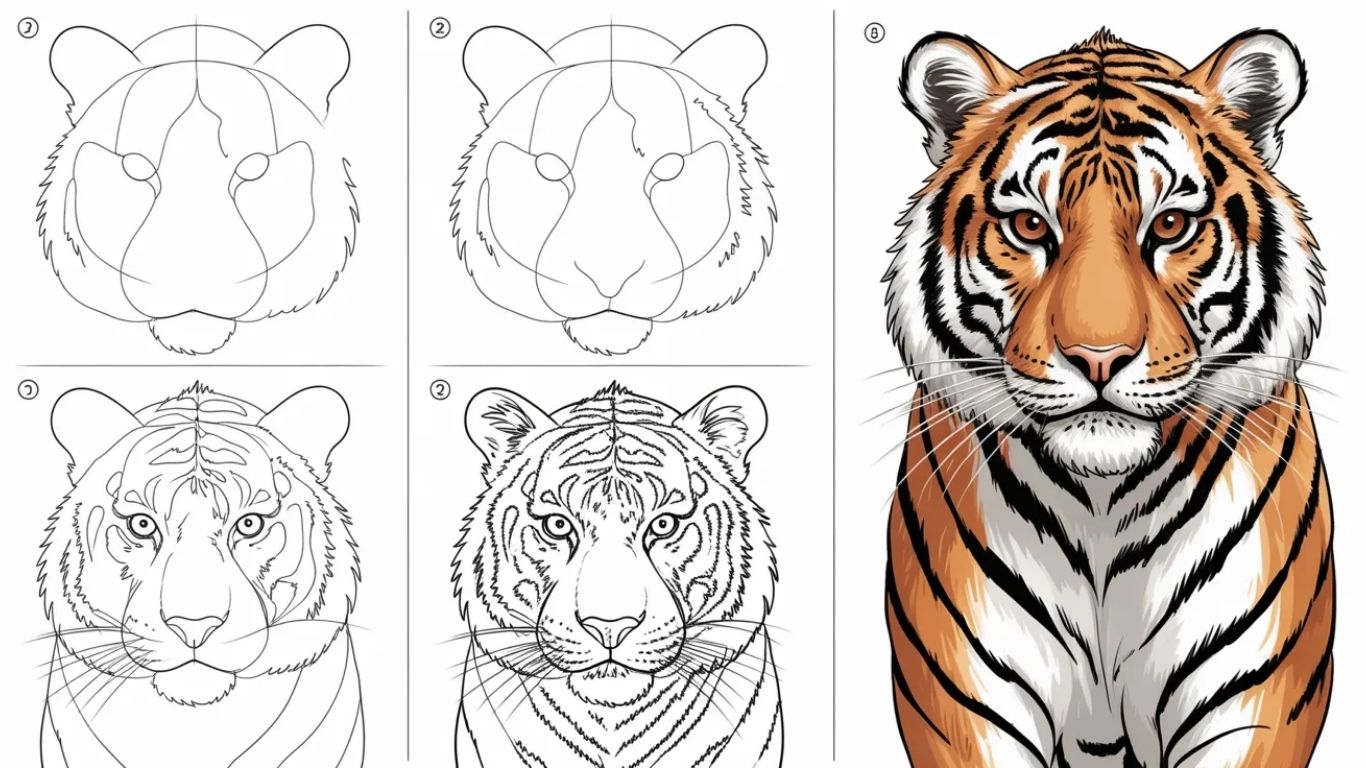
Drawing the Head and Face
Now let’s give your tiger personality.
Key facial parts to sketch:
-
Two almond-shaped eyes
-
A small triangle nose
-
Curved mouth lines
-
Rounded ears
Keep it soft and light at first.
You can always darken later.
Shaping the Body
Using your oval as a guide:
-
Smooth out the back
-
Add the chest curve
-
Shape the belly line
Tigers are muscular but graceful — like a strong athlete.
Avoid making it too skinny or stiff.
Adding Legs and Tail
Now connect those guide lines.
Leg tips:
-
Front legs are straight and strong
-
Back legs have a bend like a “Z” shape
-
Paws look like soft rectangles
Tail tips:
-
Start thick at the base
-
Get thinner toward the tip
-
Let it curve naturally
Your tiger should feel like it can move.
Creating Realistic Stripes
This is where your tiger becomes a tiger.
Stripes are not straight lines.
They’re curved, broken, and uneven.
Stripe tips:
-
Thicker near the body
-
Thinner toward legs and face
-
Never perfectly symmetrical
Nature loves variety!
Working on Eyes and Expression
The eyes give life.
For powerful tiger eyes:
-
Add dark outlines
-
Shade the pupils
-
Leave tiny white highlights
This makes them look shiny and alive — like tiny windows of emotion.
Adding Fur Texture
Instead of hard lines, use short strokes.
Think of drawing tiny hairs.
-
Around cheeks
-
Along belly
-
Near tail edges
This makes your tiger soft and realistic instead of flat.
Shading for Depth
Shading turns a drawing into art.
Where to shade:
-
Under the belly
-
Behind legs
-
Under the head
-
Inside ears
Press lightly first. Build darker slowly.
Like sunset turning into night.
Common Mistakes to Avoid
Making stripes straight
Skipping basic shapes
Drawing too dark too soon
Forgetting body curves
Go slow — good art loves patience.
Easy Tiger Drawing for Kids
For younger artists:
-
Use big shapes
-
Fewer stripes
-
Simple face
A cartoon-style tiger is a great starting point.
Once confident, move into realism.
Making Your Tiger Look Real
Want next-level results?
Try this:
Study real photos
Practice paws separately
Focus on eye details
Use shading gradually
Realism comes from observation.
Practicing Like an Artist
You won’t master it in one try — and that’s okay.
Draw a tiger:
-
Today
-
Tomorrow
-
Next week
Each time gets better.
Progress beats perfection.
Final Touches and Cleanup
Now:
-
Erase guide lines
-
Darken final outlines
-
Add small shadows
-
Fix any rough spots
Step back.
Smile.
You just drew a tiger!
Conclusion
Learning how to draw a tiger is like learning to ride a bike.
At first, it feels tricky.
Then suddenly — it clicks.
With simple shapes, gentle shading, and a little patience, anyone can do it — yes, even you.
Don’t worry about being perfect.
Just enjoy the process.
Every great artist started with messy sketches too.
So keep drawing. Keep smiling. And let your tiger roar off the page.
Frequently Asked Questions (FAQs)
1. Is drawing a tiger hard for beginners?
Not at all! When broken into simple steps and shapes, anyone can learn easily.
2. How long does it take to learn how to draw a tiger?
Basic drawings can be done in one session, while realistic skill improves with practice.
3. Should I use pencil or pen first?
Start with pencil so you can erase mistakes, then outline with pen if you like.
4. How do I make tiger stripes look natural?
Keep them uneven, curved, and different sizes — just like in nature.
5. Can kids learn how to draw a tiger too?
Absolutely! Start with simple shapes and cartoon styles for fun learning.
For More visit: Thecelebrities


